QuTiP Virtual Lab Dev Log #6
In this week of developing the QuTiP Virtual Lab, I ran into an obstacle with the build system.
It seems like the latest update to empack actually broke the ability to compile QuTiP into WebAssembly.
So during this week, I focused on the user interface instead of the simulation logic.
Since the application is meant to be used cross-platform, I started thinking about the user experience for tablets. Initially I thought that the application would feature a canvas with tools for a user to drag-and-drop, but as it turns out, drag-and-drop is not intuitive on a tablet. Do I tap the tool and then drag, or just put my finger down and drag in a single motion? It’s confusing. Besides this, the ability to place items on a canvas at any position is secondary to the main goal of the application, which is simulation.
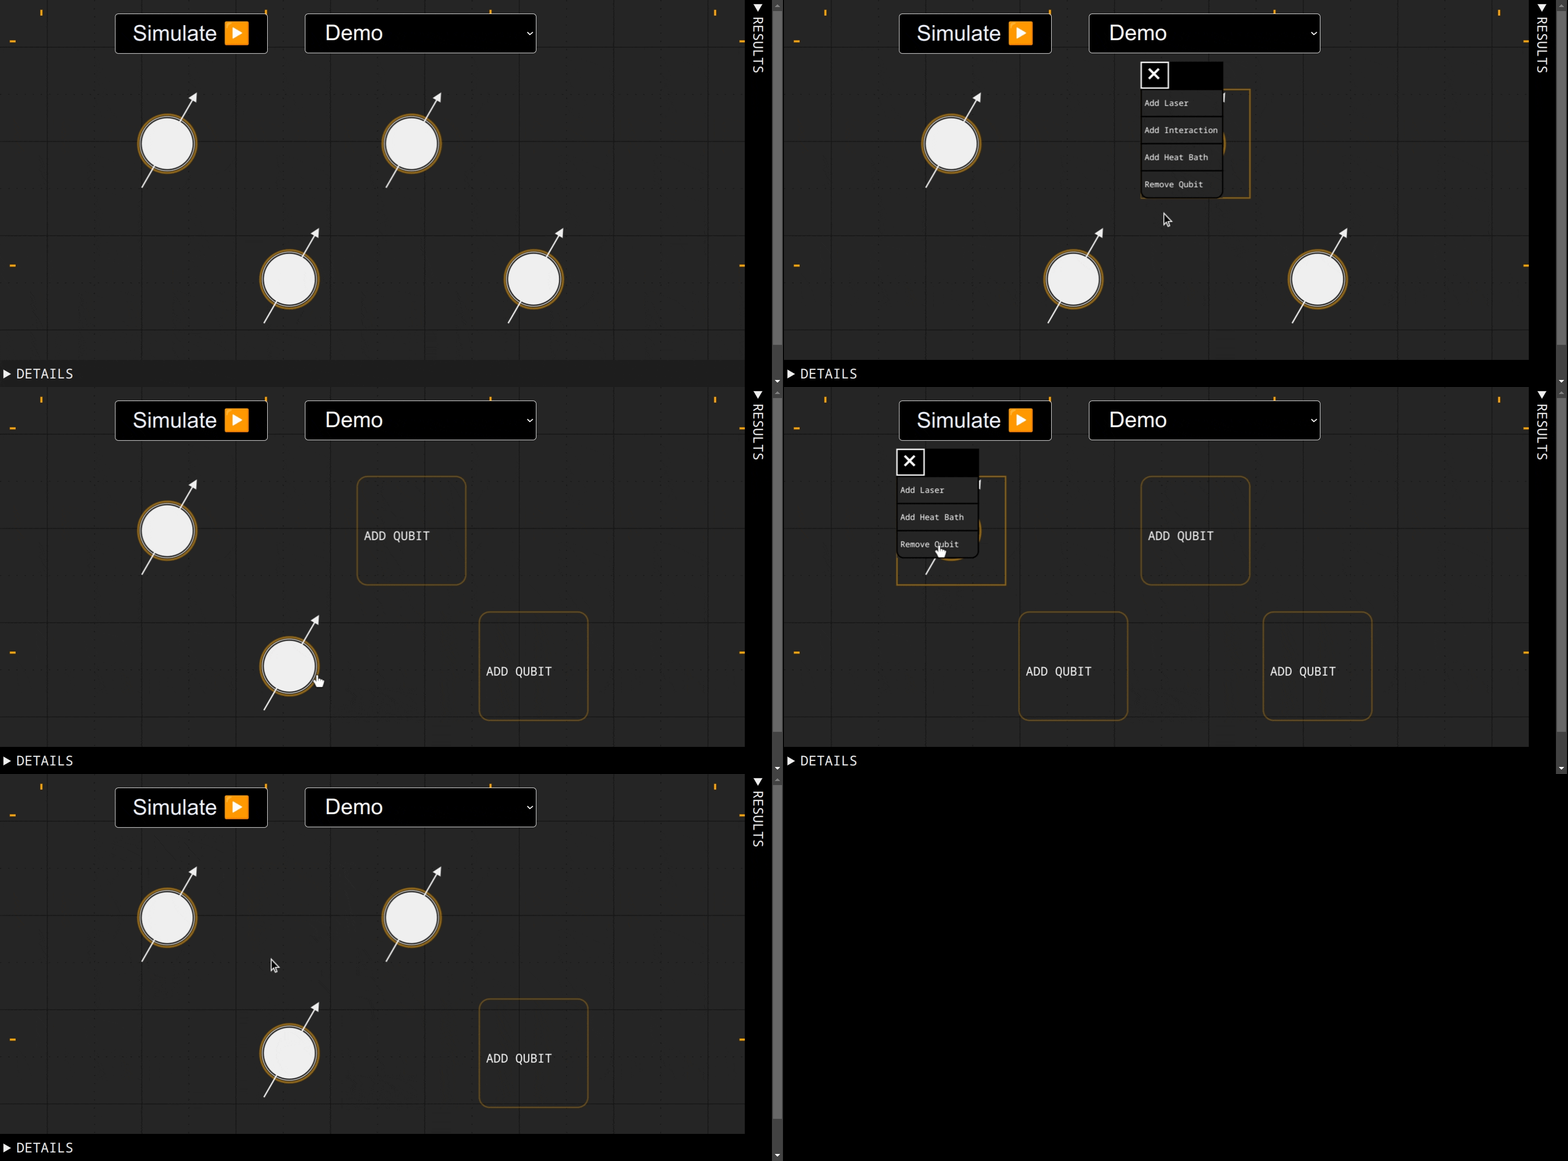
So I abandoned the drag-and-drop and proceeded in a new direction. The canvas would feature slots for up to 4 qubits that the user could tap to activate. Once the qubit was activated, the user could then tap the qubit to bring up the tool menu.

Among other items, the menu includes the ability to add interactions between two qubits. This was actually fairly complex to implement, so it took most of my development time this week. The work was composed of two parts: (1) render the interaction on the canvas and (2) implementing the state machine to guide a user through setting up an interaction.
Rendering the Interaction to the Canvas
Our canvas library is React-konva, which has a Line primitive that is useful for well, drawing lines between things.
We can feed it the coordinates of the two qubits that are interacting, and it will render a line connecting them.
Since we allow multiple interaction operators, we also want to add a label to the line with the interaction operator symbol.
In order for this to be legible, we want to place the label slightly adjacent to the line instead of directly on top of it.
We can do this by nudging the label coordinates in the direction of the line’s normal vector:
| |
The normal line can be determined by multiplying the vector \(\begin{pmatrix}x \ y\end{pmatrix}\) with the 2D rotation matrix at \(\pi/2\):
\begin{pmatrix}
\cos{\pi/2} & -\sin{\pi/2} \\\
\sin{\pi/2} & \cos{\pi/2}
\end{pmatrix}
=
\begin{pmatrix}
0 & -1 \\\
1 & 0
\end{pmatrix}
I then played with the amount of offset until I settled on \(30\).
Implementing the Interaction Setup
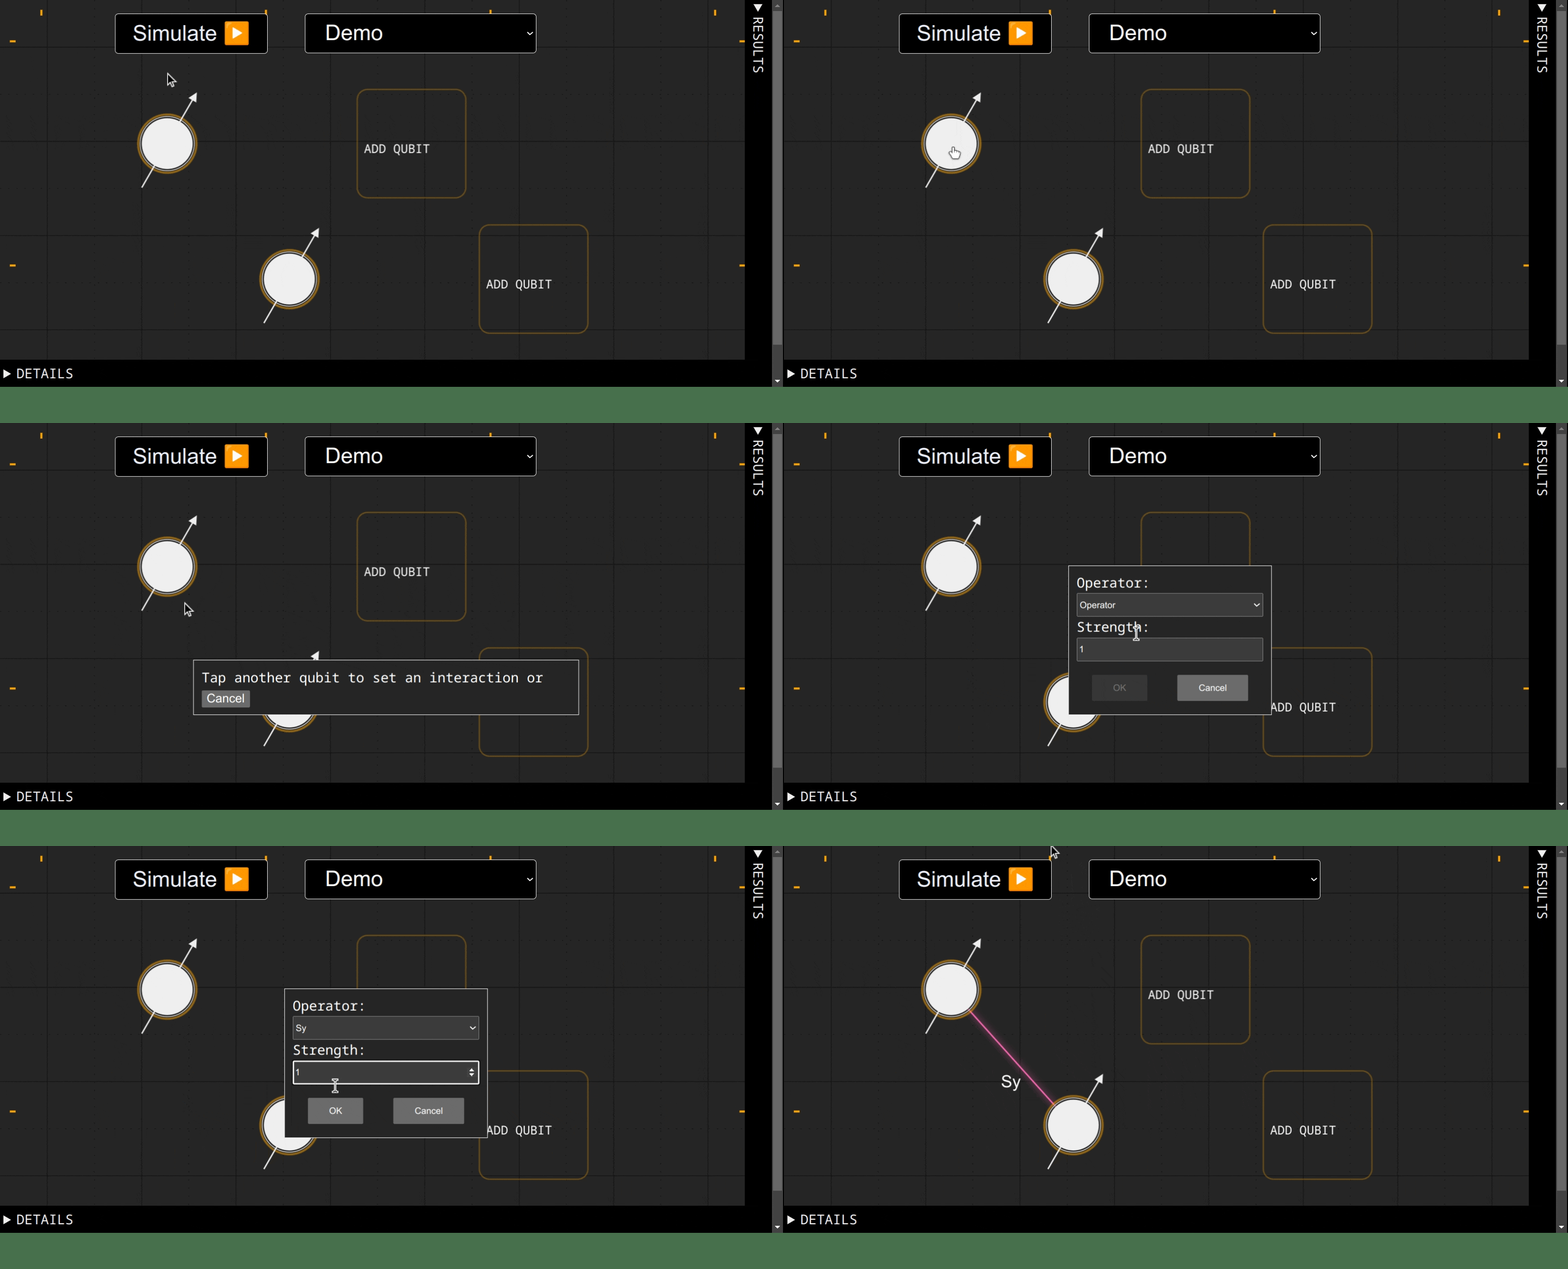
The user flow for setting up an interaction between two qubits can be broken down into steps:
- The user taps on an active qubit to bring up the menu
- The user selects ‘Add an Interaction’ from the menu
- The user selects a different qubit to indicate the pair
- A modal is shown to allow the user to select an operator, and the coupling strength of the interaction. User selects and taps ‘submit’
- Done! The interaction is saved and rendered.
This flow is simple enough that it can be implemented using React’s useState hook.
I might try to refactor this later, but each step listed above maps to a state variable that we can track using useState:
| |
The first item in brackets is the state variable, and the second is the setter, which is used to update the state. We can link each step to the next by implementing handlers:
| |
All we have to do to bind this to the UI is to pass the handlers to the onClick props in our markup, and voila, we’ve implemented the interaction form!

Next Steps
Next week I plan on implementing the code to link the canvas to the simulation. Most of this is just plumbing and will not be seen by the user, but the application is getting closer to fully allowing a user to simulate a quantum system by just tapping on a graphical interface. Also – hopefully the empack bug will be fixed by then!
Comments