QuTiP Virtual Lab Dev Log #1
Let’s face it: learning quantum mechanics is hard.
This is due to a number of reasons, but one common solution would be to leverage computer simulations to help students get a feeling for real-world quantum systems.
One such tool that can do this is the Python pacakge QuTiP (Quantum Toolbox in Python).1
It has support for solving the dynamics of a variety of quantum systems, as well as some basic visualization tools.
However, this requires students to learn how to program in Python before they can learn quantum mechanics.
If we could supplement the package with a nice, user-friendly GUI, we could reduce the cognitive load and help teach tomorrow’s quantum physicists much more efficiently.
This is the motivation for the project that I have started working on, in collaboration with the QuTiP maintainers and with support from NumFOCUS, through Google Summer of Code. In this blog, I am planning on logging my progress (or problems) towards developing a front-end for the QuTiP package.
Initial Plan
The plan is to develop a web-based application, so that it is available to multiple platforms (desktop and mobile).
Since QuTiP is a Python package, and the web browser only runs Javascript, we first must decide how to connect the two.
The typical way to do this is to write a Python back-end with a REST API and run it on a separate server.
However, it’s costly to maintain a separate server.
Fortunately, with tools like WebAssembly and empack2, we can get QuTiP to run fully in the browser, with no separate server required.
With several proof-of-concept projects already available for compiling Python to WebAssembly, we decided to try it.
First Steps
This week I have focused on establishing a proof-of-concept, i.e. a way to compile QuTiP to WebAssembly and run it in the browser. Empack has a example project that runs a Python REPL in the browser3 , so I started with that. It also has an example of compiling Python packages to WebAssembly, so in order to establish my PoC, all I would have to do is find a way to include QuTiP in the packages to be compiled.
This turned out to be relatively easy going.
Empack takes a YAML file with a list of Python packages to compile, so I added QuTiP to the list and ran it using micromamba.
The build scripts in the example repo required a little fiddling with to run correctly, but once I figured that out, running empack pack produced two files:
python_runtime_browser.wasm: The list of Python packages, compiled to WebAssemblypython_runtime_browser.js: The “glue” code for loading WebAssembly into browser memory
The second file enables me to call Python code from Javascript, and handle the result with Javascript i.e. pipe the results of QuTiP simulations into Javascript for rendering to the DOM.
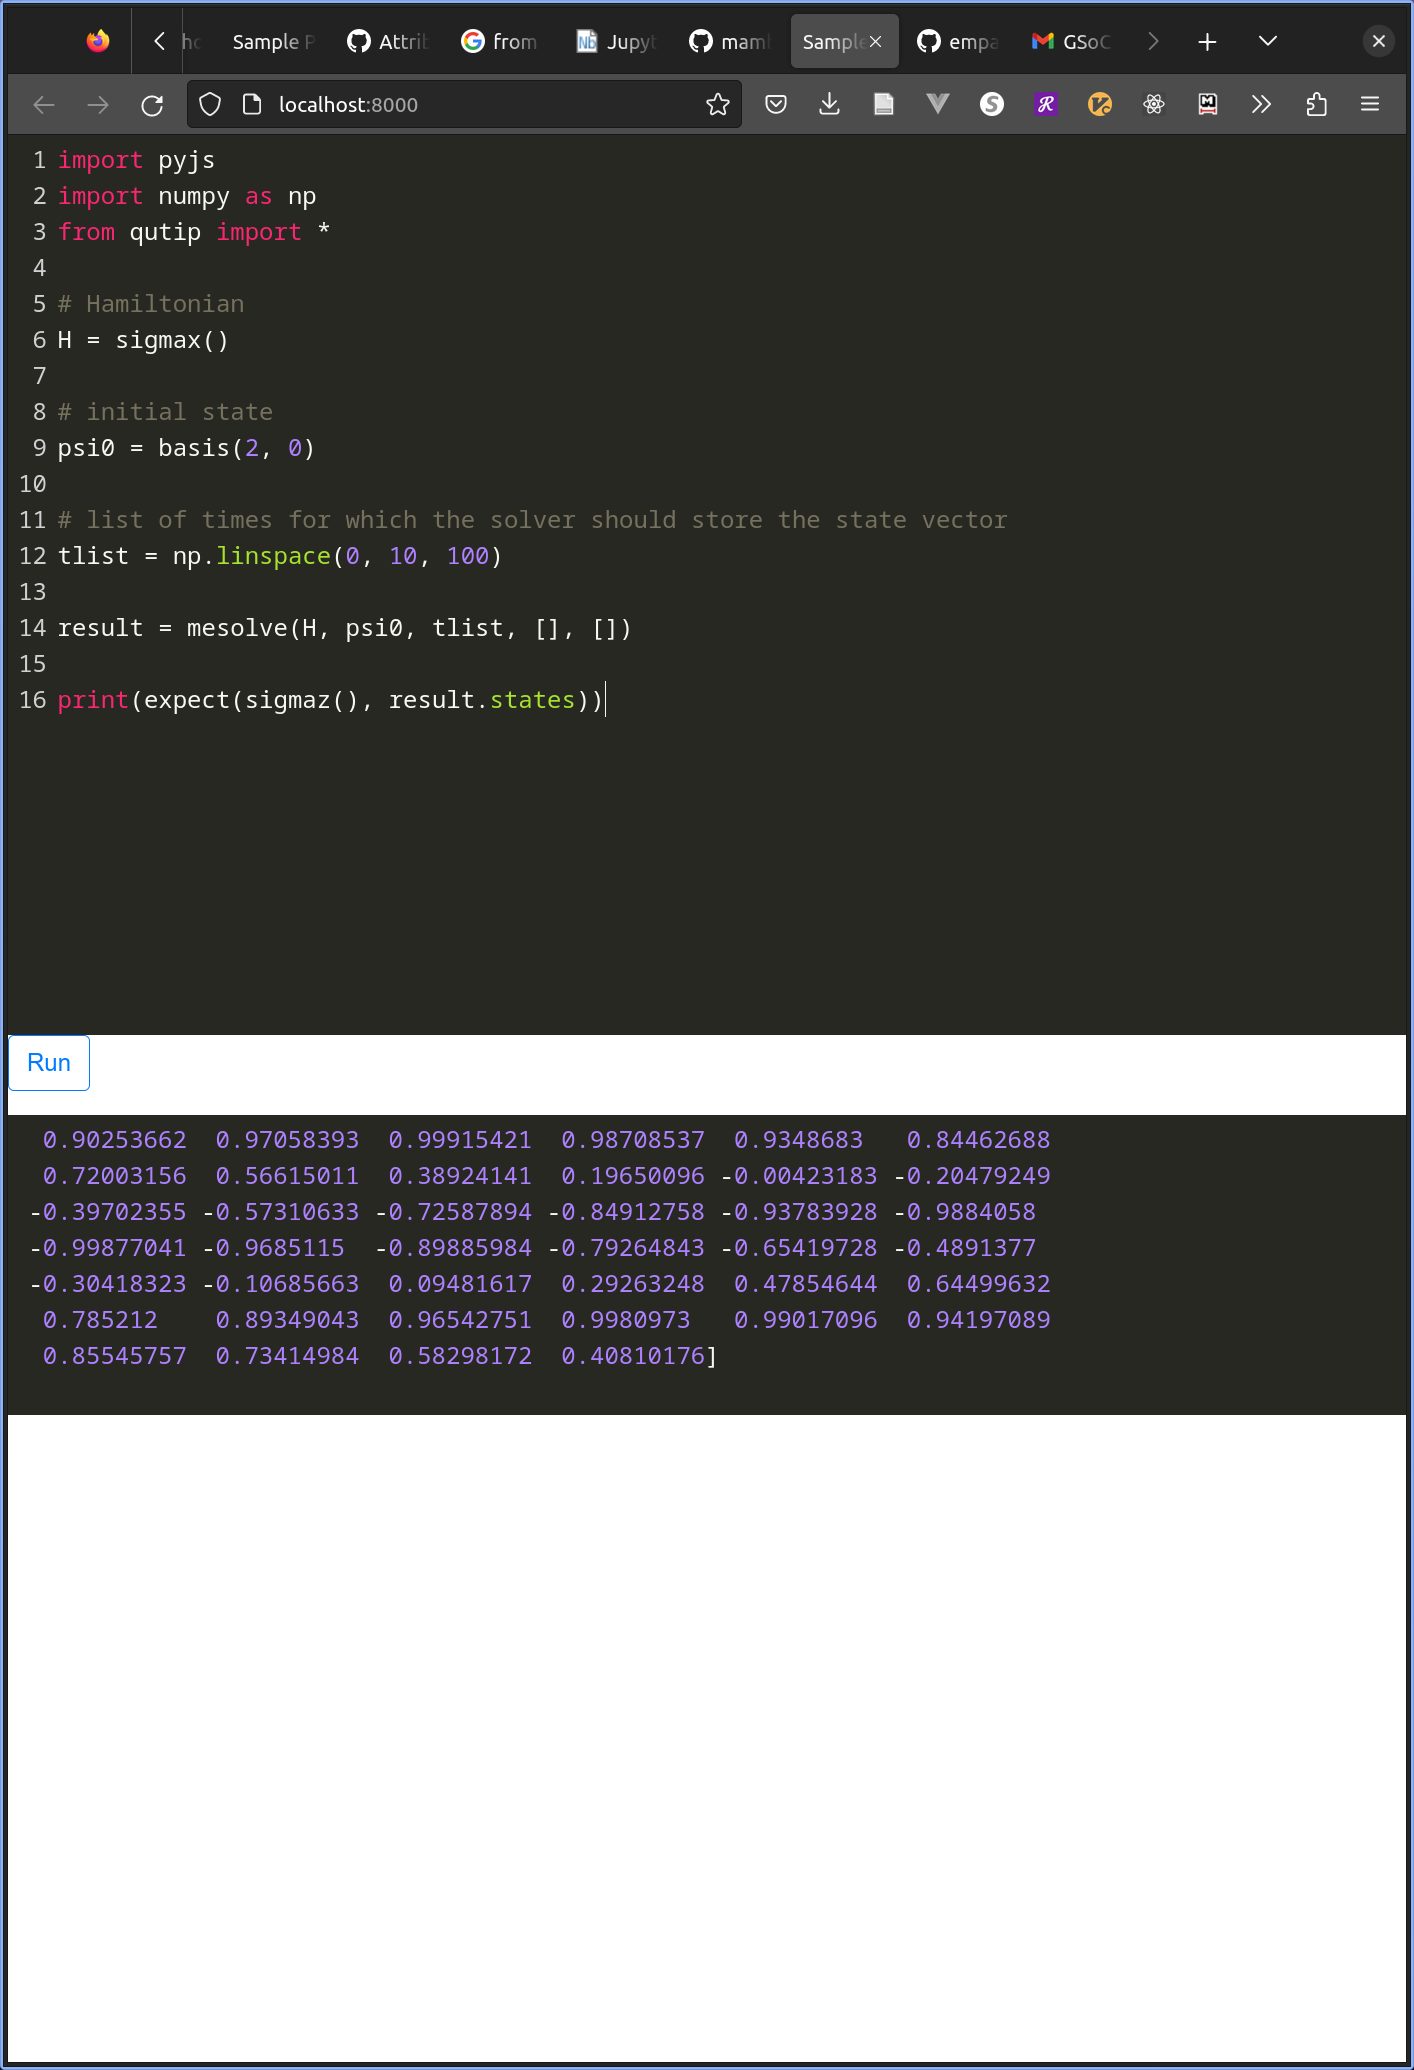
With all this in place, I loaded the application into the browser with a small Python script, and attempted to run a little simulation with QuTiP:

Success!
The loading time is a little long, but that can be fixed later.
Next: Establishing a Build Environment.
This initial stage can seem a bit inconsequential, but investing the time upfront will save hours of headache over the course of the application’s lifetime.
The goal here is to establish deterministic builds using a Dockerfile, so that anyone on any platform (Mac, Windows, Linux, CI) can build the application easily.
More on this later, once I have finished building the Dockerfile!
Comments